

As you probably know (if not, we recommend reading our latest article on the end of Universal Analytics), Google has announced that it will be deprecating Universal Analytics starting 1 July 2023. This means that your Universal Analytics properties will completely stop receiving data (hits) starting in early July 2023.
Google Analytics 4, or “GA4”, will replace its predecessor originally released in 2013.
If you have a Universal Analytics property and you don’t know how to set up GA4, you are in the right place! Read on.
In this guide? Discover how to add a Google Analytics 4 property
1. Create a Google Analytics 4 property
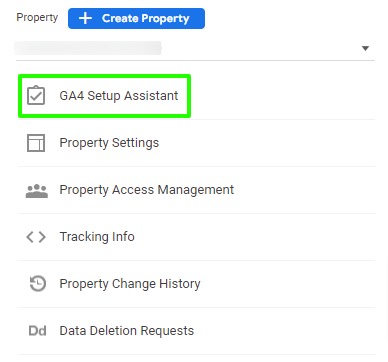
Log in to your Google Analytics account and access your Google Analytics account administration settings. Under “Property Settings”, look for the “Upgrade to GA4” link.
If you do not yet have a Google Analytics account, you must first create one for free by visiting the official Google Analytics page.
If the upgrade option is not available to you, you can click on the “GA4 Setup Assistant” section or click on “Create Property” to create a new GA4 property.
Click the “Get Started” button to begin the setup process with the Google Analytics setup assistant. You will then have several options depending on your current GA configuration.
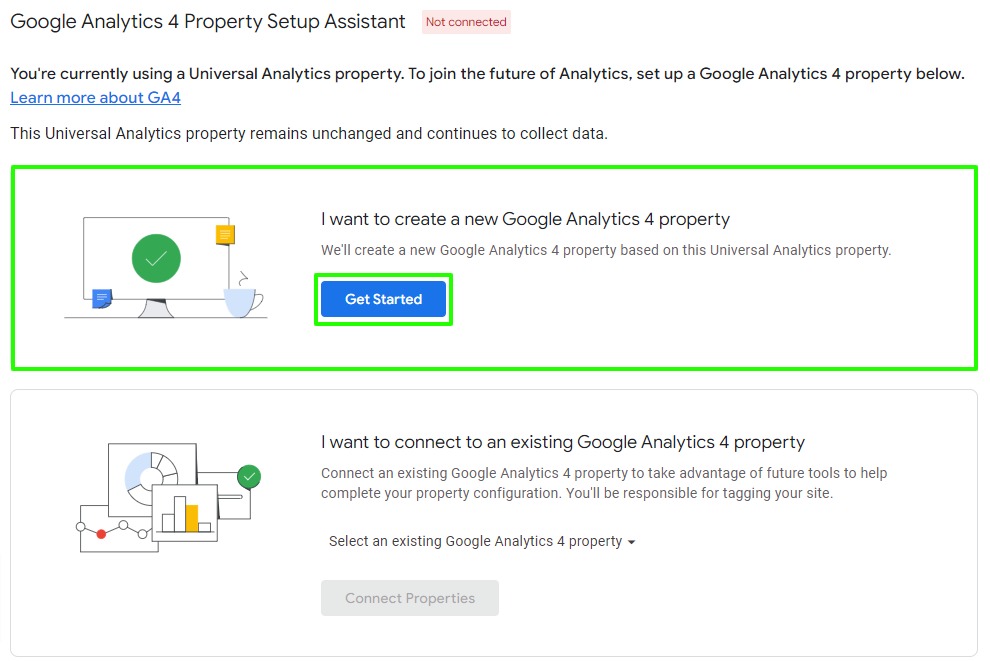
If you are using the Global Site Tag to implement GA, the assistant will be able to enable data collection with your existing tags.
If you are not using the Global Site Tag, the following steps will show you how to enable data collection using Google Tag Manager (GTM).
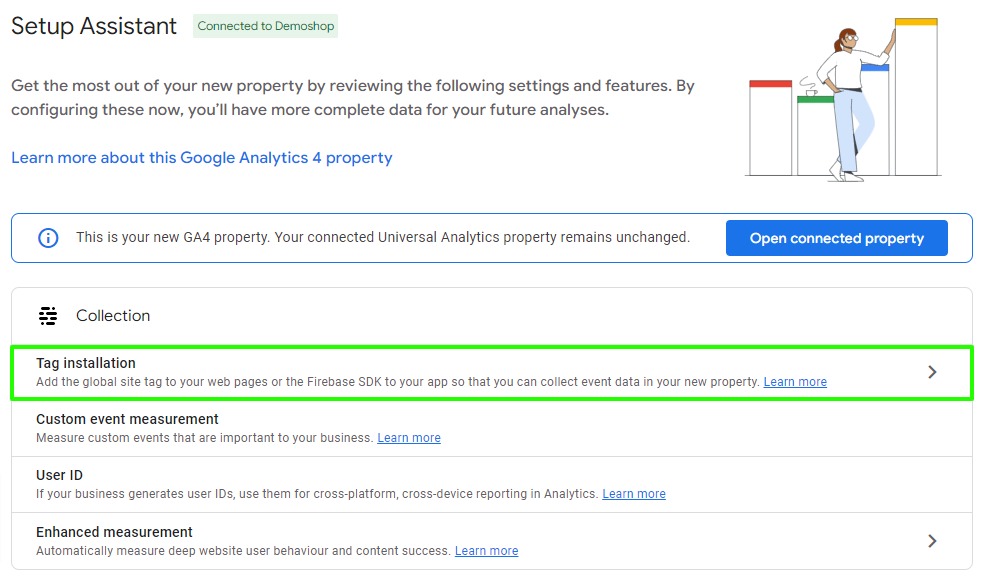
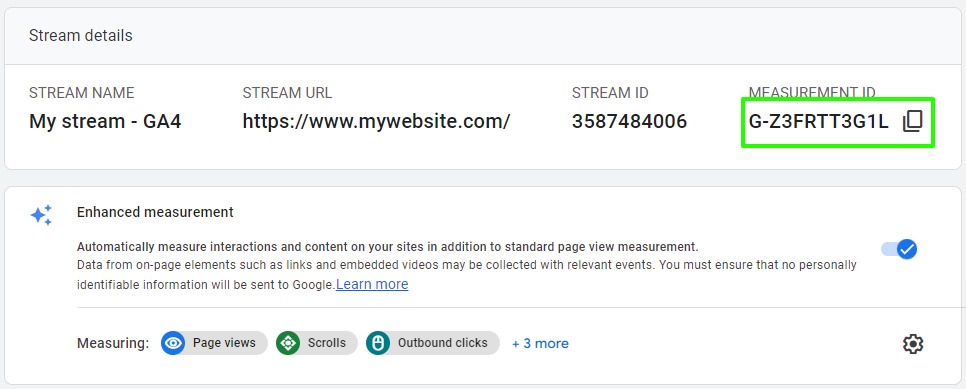
Before you can start collecting data, you need to generate a measurement ID for your new GA4 property. The measurement ID is similar to the Universal Analytics ID. Enter the “Tag installation” menu. See the green box below.
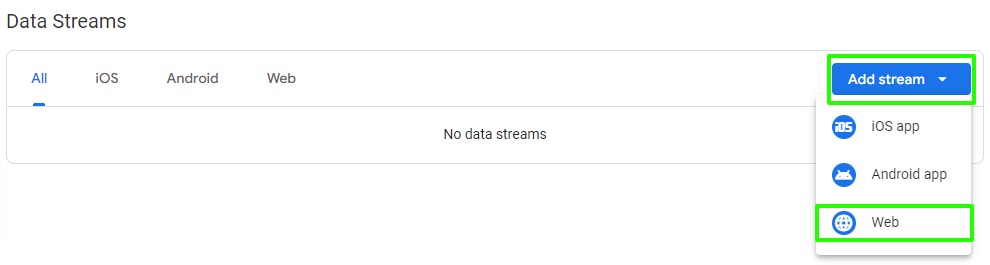
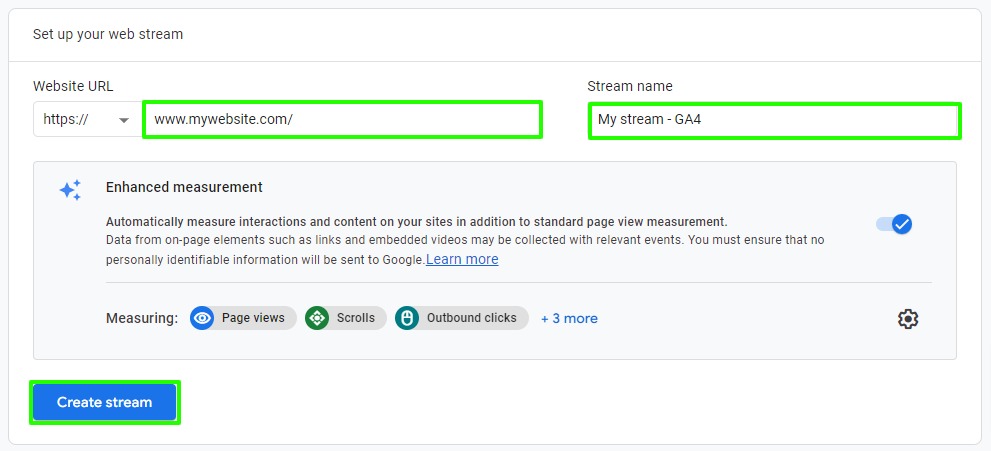
GA4 does not have views like Universal Analytics. Instead, it features data streams. The data stream automatically measures certain events such as scrolls, outbound link clicks, site searches, file downloads, etc. Expand the drop-down list to add a stream and select the item you want to track.
In this example, we are tracking a website, so we’ll select Web.
Configure your data stream by entering your website URL and stream name.
Click on “Create Stream” when you are finished.
Now that you have your measurement ID, copy it as it is needed to configure the GA4 configuration tag in Google Tag Manager.
If you use a particular CMS such as WordPress, Magento, Drupal, etc. and your current version of Google Analytics was installed without going through the Global Site Tag or using Google Tag Manager (GTM) but thanks to a particular plugin, please refer to the documentation provided by the tool in question.
2. Add the tracking code to your website
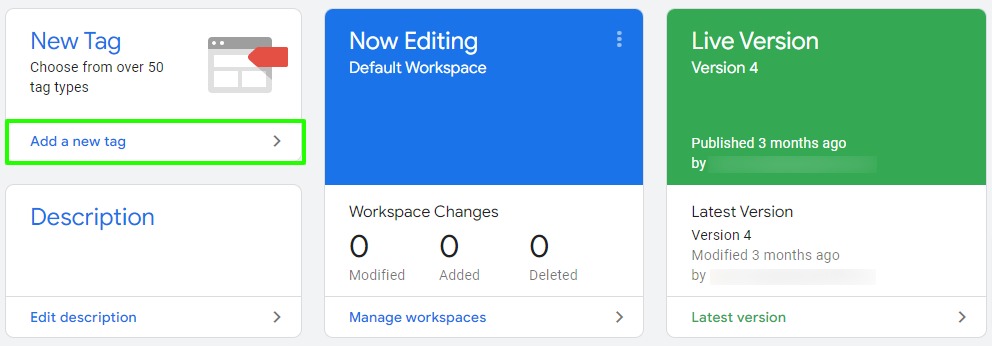
Connect your free tag management tool Google Tag Manager and click on “Add new tag”.
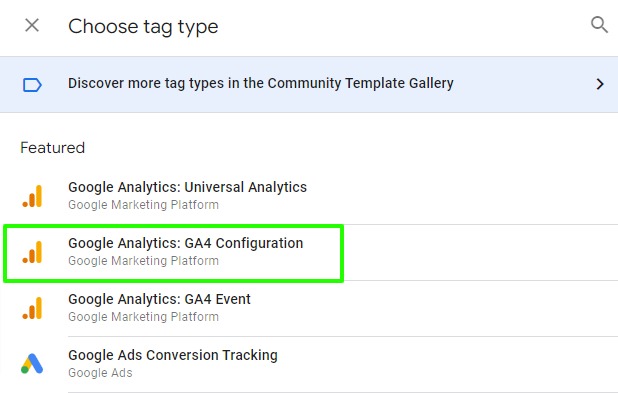
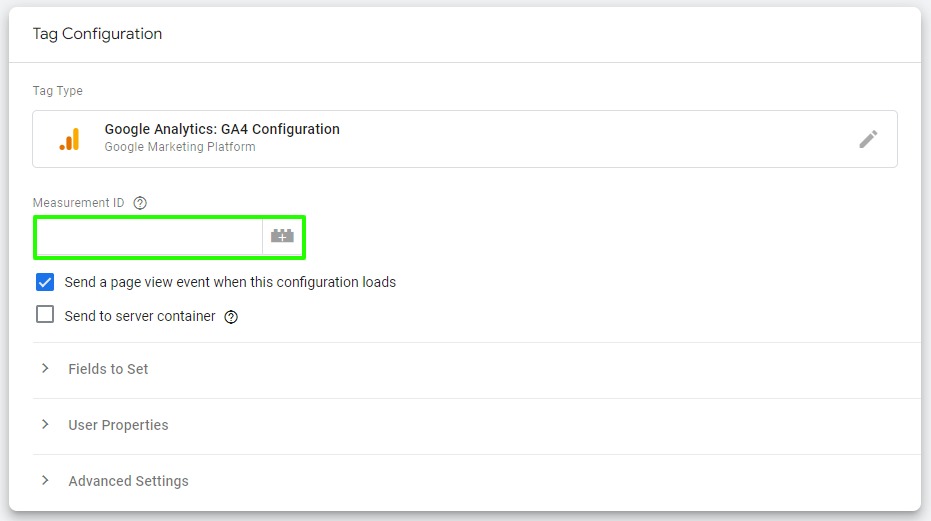
Select “Tag configuration” and choose “Google Analytics: GA4 Configuration” as tag type.
Fill in the Measurement ID that is in your new property and that you previously copied and paste this ID into the Measurement ID field as shown in the image below.
Advice: We recommend that you create a constant variable for the measurement ID instead of entering it manually. This will allow you to reference the measurement ID for other tags and avoid inconsistencies in the future.
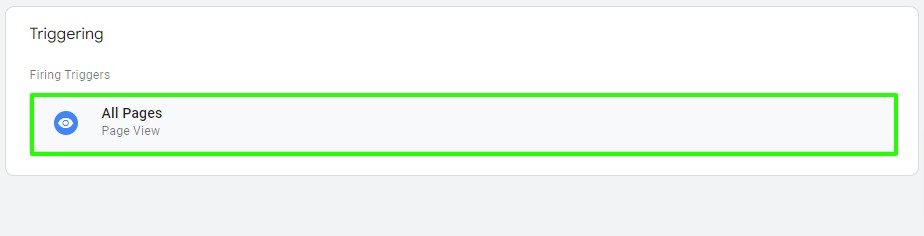
Now that your tag is defined, you need to configure your trigger so that the code is triggered on all pages and click on “Save” to complete the configuration of GA4.
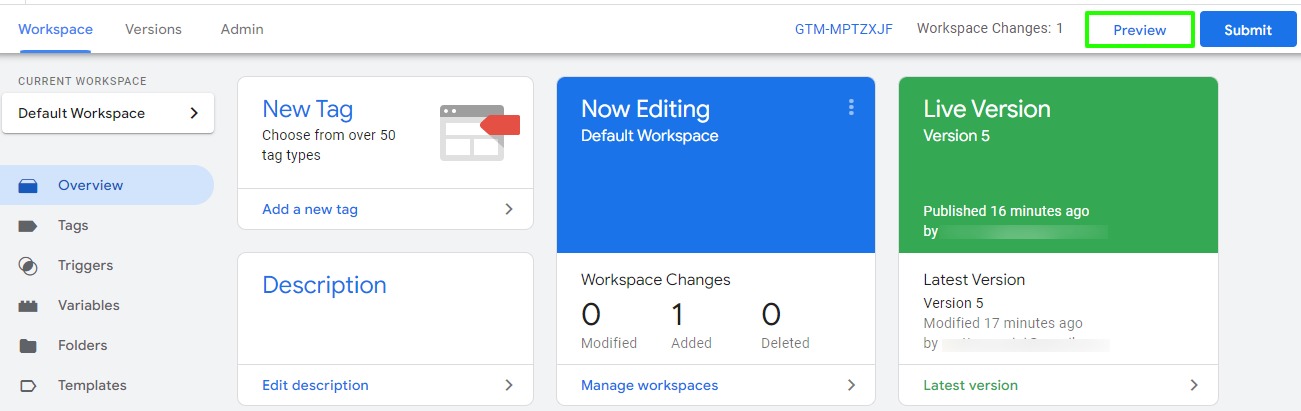
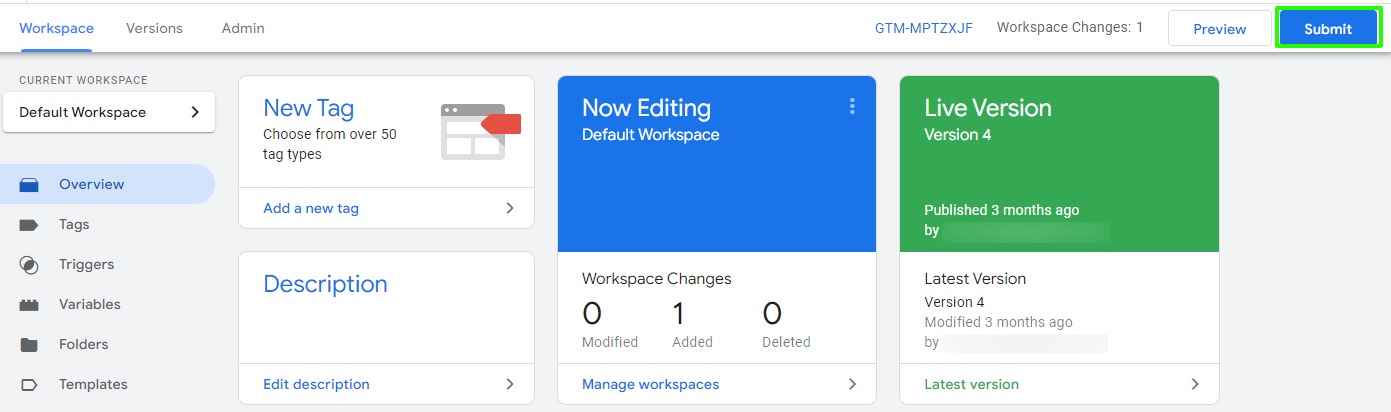
You can now test your GA4 tag with the preview mode of your Google Tag Manager by clicking on the “Preview” button.
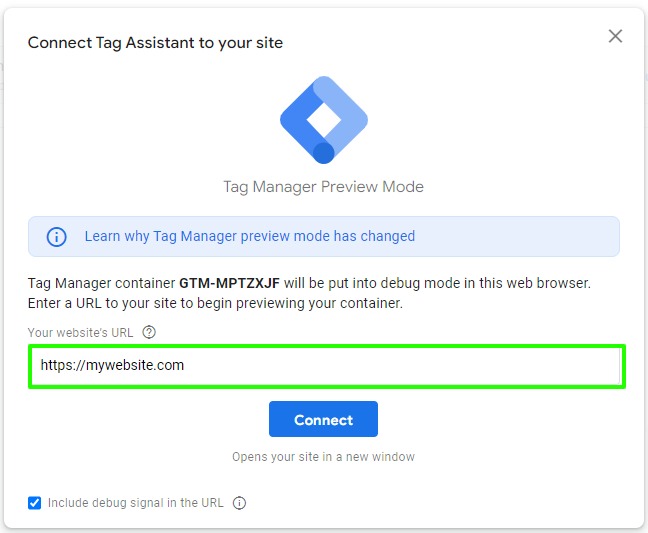
Enter the URL of your site in the field provided.
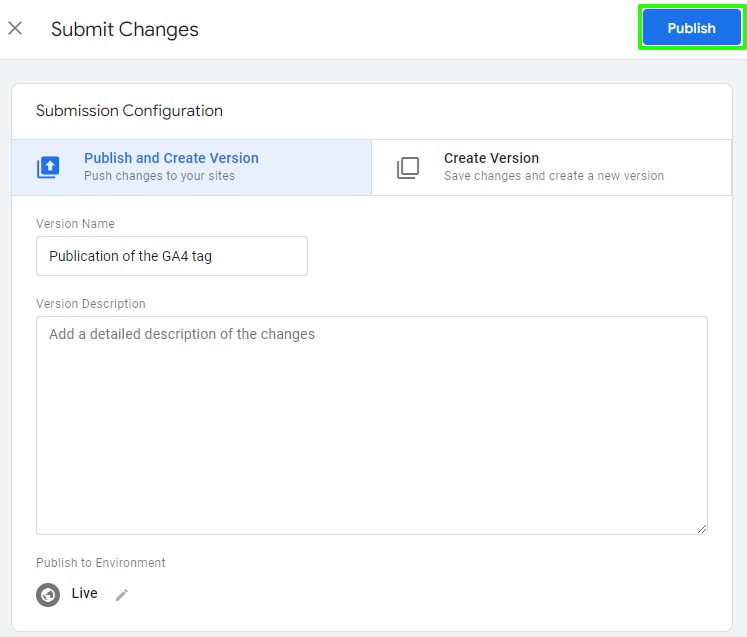
You can publish your container to put the new tag online. Remember to publish your container after testing, otherwise your GA4 property will not receive data.
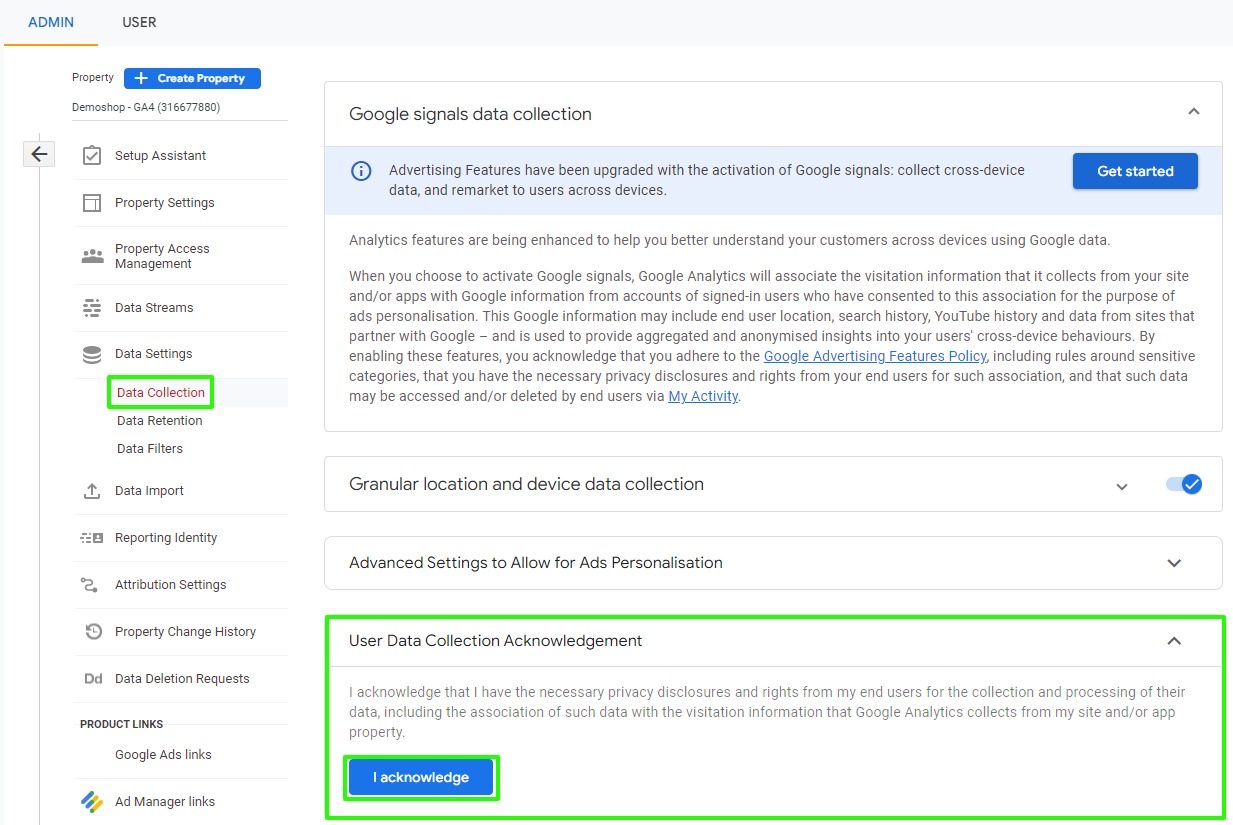
3.Enable data collection in Google Analytics
Return to Google Analytics to enable confirmation of user data collection. Access the administration settings of your Google Analytics account. Under “Data settings” go to the “Data collection” section then accept the “confirmation of user data collection”.
4. Verify that the GA4 property is collecting data
Once you add the Analytics tag to your website, Google Analytics starts sending data to your property very quickly (usually after 10-15 minutes).
To verify that your property is receiving data, check the “Real time” report. If you have configured your measurement code correctly, the Real-time Users card should refresh every 15 seconds or so (showing a new number of users).
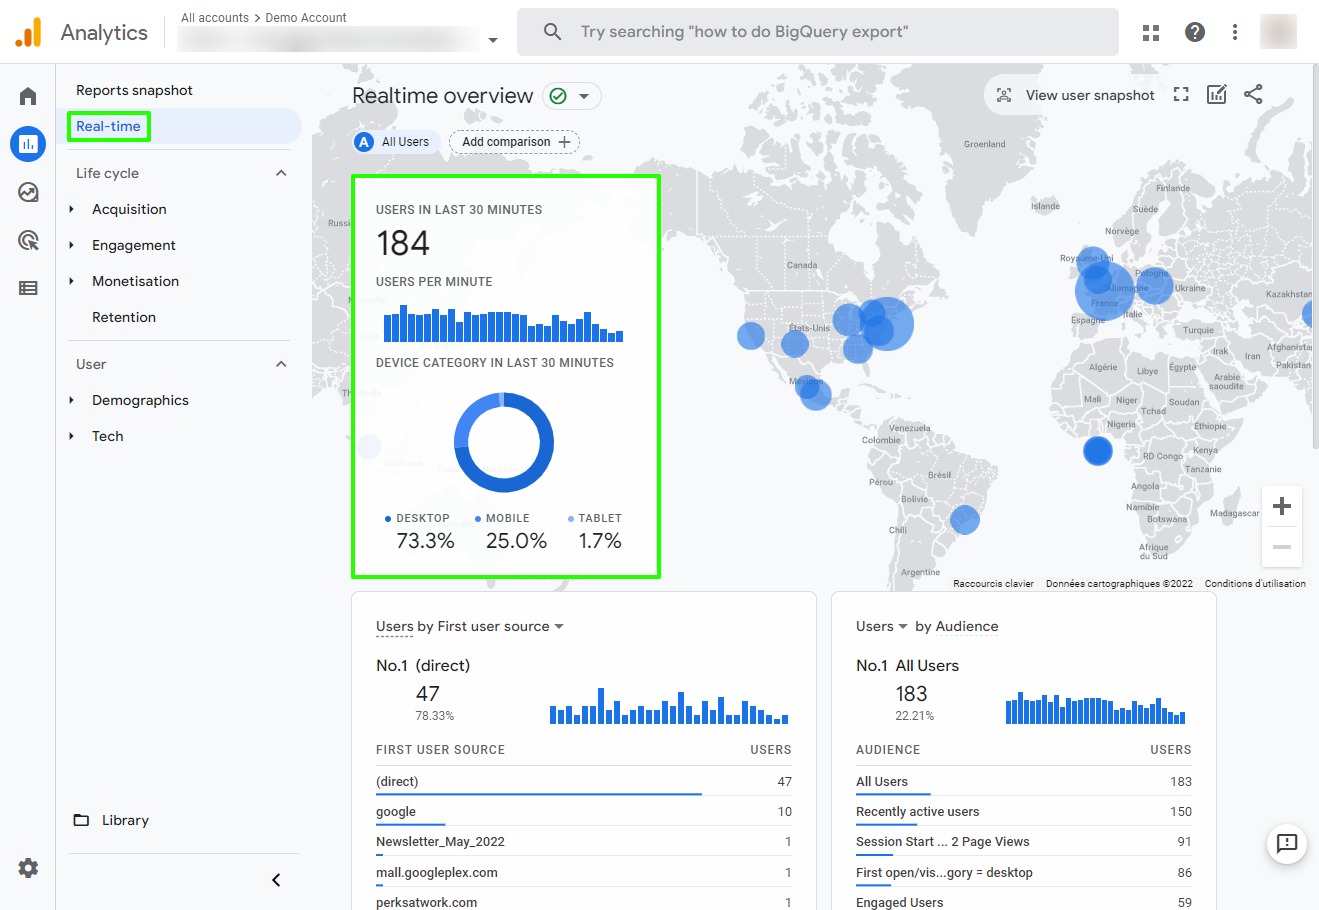
It takes 24-48 hours for Analytics to process data from other reports.
Conclusion
Now that you have completed the base configuration of GA4, you can start using it to more effectively track users and their actions. Note that events and conversions are not automatically migrated from your UA account to GA4. In order to find all your conversions and events, and therefore continue to follow your main KPIs, you will need to configure them via GTM. The same goes for e-commerce measurements.
Do not hesitate to contact us for any request, whether at the strategic or operational level. Our web tracking specialists will be happy to support you at every stage of your project.